


Vent Fix Under $15 Stops Headlight Condensation on Trucks and Fleets
A little fog inside your headlight after a rainstorm usually isn’t a problem. Run the lights for a moderate period and check again: if it clears, you’re done. If you see standing water, droplets that won’t go away, or fog that returns every time it rains, dry the housing with a hairdryer through the bulb port, then inspect the seal and vent tubes before you drive at night. Skip the drilling and rice hacks; they cause more damage than they fix.
TL;DR:
- Moisture that clears after a moderate drive or with a hairdryer indicates a seal or vent issue rather than a major crack.
- Replacing clogged or hardened vent tubes is a quick, inexpensive fix that often resolves recurring condensation problems.
- Full sealing or sealing-unit replacement is necessary only if moisture persists after drying, the reflector is damaged, or the housing has cracks.
- Drilling holes in headlights does not solve condensation and can introduce dirt and UV damage, making it an ineffective solution.
- Regularly inspecting vent tubes and seals at the start of seasons can prevent long-term moisture buildup and costly repairs.
Table of Contents
- How to Diagnose Whether Headlight Condensation Is Normal or a Leak
- Safe, Fast Ways to Dry a Foggy Headlight
- How to Permanently Reseal a Headlight and Fix Vent Failures
- When to Just Replace the Headlight Assembly
- Parts That Solve the Failure Points Behind Headlight Condensation
- Why Small Maintenance Beats Big Repairs
- Where to Get the Parts for a Lasting Headlight Fix
- Sources
- FAQ
How to Diagnose Whether Headlight Condensation Is Normal or a Leak
Before you touch a screwdriver, figure out what you’re actually dealing with. A quick headlight moisture fix only works if the housing is sound to begin with, and pushing a permanent fix onto a cracked lens wastes time and sealant.
Run through this checklist:
- Time-to-clear test: Turn on your headlights and drive for a moderate period. Manufacturer guidance on normal condensation clearing confirms this window is standard for thin mist caused by temperature swings.
- Bulb cover and O-ring: Pop the rear access cover and check the rubber gasket for cracking, warping, or gaps.
- Vent tubes: Locate the small rubber or plastic tubes on the back of the housing. These equalize air pressure, and a hardened or clogged vent traps moisture inside instead of letting it breathe out.
- Visible cracks: Run a finger along the lens-to-housing seam and check for hairline fractures, especially near mounting points.
- Pooling and reflector damage: Standing water at the bottom of the housing, or a reflector that looks cloudy or peeling, means the problem has been going on longer than one rainy drive.
If everything checks out but moisture keeps coming back, the common causes of persistent condensation usually trace back to a failed seal or a blocked vent, not bad luck.
Safe, Fast Ways to Dry a Foggy Headlight
Once you’ve confirmed the housing itself is intact, drying it out is straightforward. These methods work whether you’re dealing with a car headlight or moisture in trailer lights on a work truck, and none of them require pulling the lens.
- Run the lights. A moderate duration of driving with headlights on often clears thin residual mist through simple heat cycling.
- Hairdryer through the bulb access. Remove the rear bulb cover, set the dryer to low heat, and hold it 6 to 8 inches from the opening for 5 to 10 minutes. Keep it moving so you don’t scorch nearby wiring or plastic.
- Silica gel packets overnight. Drop a few desiccant packets into the bulb cavity, reseal the cover loosely, and leave it overnight. Purpose-made desiccants pull humidity without leaving the residue that rice or other kitchen fixes do. Remove the packets before you reinstall the bulb.
- Isopropyl alcohol for standing water. If you can see actual pooled water, a small amount of isopropyl alcohol swirled inside and drained out helps because it mixes with water and evaporates faster than water alone.
Pro Tip: Skip the heat gun. It runs hotter than a hairdryer and can warp the plastic lens or melt internal wiring before you notice the damage.
Compressed air can help push moisture toward the vent opening, but keep the nozzle away from the bulb socket. And no, drilling a hole doesn’t help — it just gives dust, road grit, and UV light a permanent way in.
How to Permanently Reseal a Headlight and Fix Vent Failures
Drying buys you time. If moisture keeps returning after a proper dry-out, the housing itself needs work. This is the difference between a headlight moisture fix that lasts a season and one that lasts the life of the vehicle.
Start with the cheap fix first: vent tubes. Replacing a hardened or clogged vent tube often costs under $15 and takes fifteen minutes, and it solves the problem more often than people expect before they ever touch the seal.
If the vent isn’t the culprit, full headlight seal replacement is next:
- Remove the headlight assembly from the vehicle.
- Clean the sealing surfaces with isopropyl alcohol to strip old adhesive residue.
- Oven-soften the housing at a controlled low temperature to loosen the factory seal without warping the lens, then carefully separate it from the housing.
- Scrape away the old butyl completely.
- Apply new butyl rope or automotive-grade sealant around the full perimeter. Avoid household silicone. It doesn’t flex the same way and tends to fail again within a year.
- Clamp the lens back into the housing and let it cure fully before reinstalling.
Pro Tip: Leave a small gap, roughly the width of a pencil, at the lowest point when reapplying foam vent strips. This small gap can prevent trapping moisture and reduce failure risk.
When to Just Replace the Headlight Assembly
Sometimes resealing isn’t worth the effort. Replace the whole unit when the reflector coating is peeling or cloudy, when the housing itself has structural cracks beyond the seam, or when you’ve resealed the same headlight twice and it’s still fogging up.
Cost breaks down roughly like this:
- DIY reseal: Butyl rope and basic tools run cheap, mostly your time and a tube of sealant.
- Professional reseal: Labor adds up fast since separating and recurring a lens properly takes real shop time.
- New sealed-beam assembly: Parts plus fitment cost more upfront but eliminate the ingress-prone seam entirely, since sealed units don’t rely on a separable lens joint.
Check whether a manufacturer TSB exists for your model. Retrofit venting or housing upgrades sometimes exist for vehicles with a known condensation pattern, which can save you from repeating the same repair year after year.
Parts That Solve the Failure Points Behind Headlight Condensation
Once you know what’s actually failing, matching the part to the problem saves a second repair down the road. Corroded sockets, cracked composite housings, and worn sealed-beam units all show up as “condensation” but need different fixes.
- Socket corrosion or intermittent connection: A ceramic socket pigtail kit replaces a melted or corroded connector without touching the housing seal at all.
- Cracked or leaking rectangular housings: A 4x6 LED replacement set swaps out an ingress-prone composite unit for a sealed housing built for the job.
- Repeated ingress on 5x7/7x6 applications: A sealed-beam LED assembly skips the separable lens joint that causes most factory-seal failures.
| Failure Point | Symptom | Fix |
|---|---|---|
| Corroded socket/pins | Flickering, dim beam, melted plug | Ceramic socket pigtail kit |
| Cracked composite housing | Recurring fog, visible seam crack | 4x6 LED sealed replacement |
| Worn sealed-beam unit | Repeated ingress after reseal | 5x7/7x6 sealed-beam assembly |
Before installing any of these, confirm your socket type and bulb pattern match your vehicle, and make sure vent tubes are seated properly so the new unit doesn’t inherit the old moisture problem.
Why Small Maintenance Beats Big Repairs
Most condensation calls we hear about started as a five-minute fix that got ignored for a season. Check vent tubes at the start of fall and spring, before temperature swings make trapped moisture worse. Replace a hardened vent the same day you notice it instead of waiting for fog to show up. And if a reseal has already failed once, don’t reach for household silicone as a patch. Escalate to a full assembly replacement before the wiring or reflector takes damage too.
— All
Where to Get the Parts for a Lasting Headlight Fix
Once you’ve diagnosed the actual failure point, matching it to the right part is the difference between a fix that holds and one you’ll be redoing in six months. If corrosion or a melted connector is the issue, the H4 socket and wiring harness kit replaces the failure point directly instead of masking it.
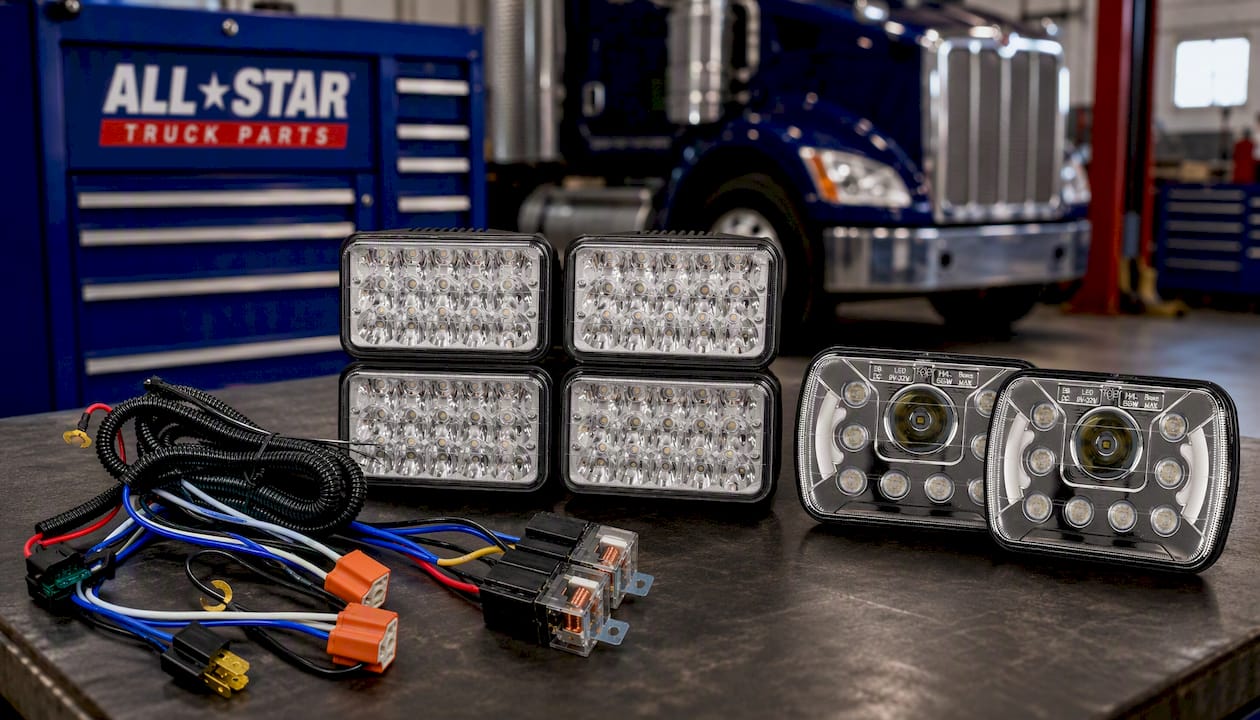
For rectangular housings that keep fogging no matter how many times you reseal them, the 4x6 LED replacement set swaps the entire ingress-prone unit for one built without a separable lens seam. Round and 5x7/7x6 applications get the same benefit from the sealed-beam LED assembly, which fits Jeep Wrangler XJ/YJ models, various sedans, and GMC, Chevrolet, and Ford trucks and vans. If a professional restoration route makes more sense for your situation, headlight restoration services are worth comparing against a full replacement.
Every listing includes fitment details, so check your bulb pattern and socket type against your vehicle before ordering. The retailer offers return support for lighting products if something doesn’t fit. Browse the full headlight catalog to find the exact match for your repair.

Sources
For deeper technical background beyond this guide, these sources cover the manufacturer and engineering side of headlight condensation:
- Jaguar headlamp condensation guidance (service bulletin)
- Headlight condensation inside: Causes & how to fix — Car Care Total
- Why does water collect inside my car’s headlights? — Popular Mechanics
- Headlight condensation causes and fixes — Ricks Free Auto Repair Advice
FAQ
How Much Does It Cost to Fix Headlight Condensation?
A vent tube replacement often runs under $15 in parts. A full DIY reseal costs more for butyl and tools, while a professional reseal or a new sealed-beam assembly costs more due to labor or parts and fitment.
How Can I Fix Water Condensation in My Headlight?
Run the lights 20 to 30 minutes first, then dry the housing with a hairdryer through the bulb port or silica gel packets overnight; if moisture keeps returning, the seal or vent tube needs replacing.
Will Drilling a Hole in My Headlight Help With Condensation?
No. Drilling a hole lets in dust, debris, and UV light permanently, and it typically causes more long-term damage than the moisture it’s meant to release.
Is It Safe to Drive With Condensation in My Headlights?
Light mist that clears within 30 minutes of driving is normal and safe. Standing water or heavy fog that reduces beam output should be dried and inspected before night driving, since it can dim your visibility.
Recommended
Related Lighting & Accessories


- $ 26.50
$ 49.95- $ 26.50 Save $ 23.45
- Unit price
- per


- $ 34.50
$ 59.95- $ 34.50 Save $ 25.45
- Unit price
- per


- $ 29.95
$ 49.95- $ 29.95 Save $ 20.00
- Unit price
- per
